ReactJS 101: Let's Build Robust Web Applications with React.
What is React and Why React?

I am a Committed and Motivated Tech optimist, whose passion lies at the intersection of Technology and Innovation.
Introduction
ReactJS or React is one of the most popular JavaScript(JS) libraries as of 2023, used for building dynamic user interfaces. It has over 200K stars on GitHub and over 40% of professional developers say they use it extensively. It has gained widespread adoption due to its simplicity, flexibility, and performance.
React is easier to learn and grasp the fundamentals than any other JS library/framework like Angular since its syntax and structure are very similar to plain JavaScript by use of an extension known as JSX. Every JavaScript concept can apply to your React application hence you can therefore build your first web application with React in very little time.
But wait, before we dive straight into how to work with React, we need to build a little bit of context.
React History
Using Wikipedia, React was created by Jordan Walke, a Software Engineer at Meta, formerly Facebook, who released an early prototype of React called "FaxJS". He was influenced by XHP, an HTML component library for PHP. It was first deployed on Facebook's News Feed in 2011 and later on Instagram in 2012 then later open-sourced at JSConf US in May 2013, the Initial Public Release.
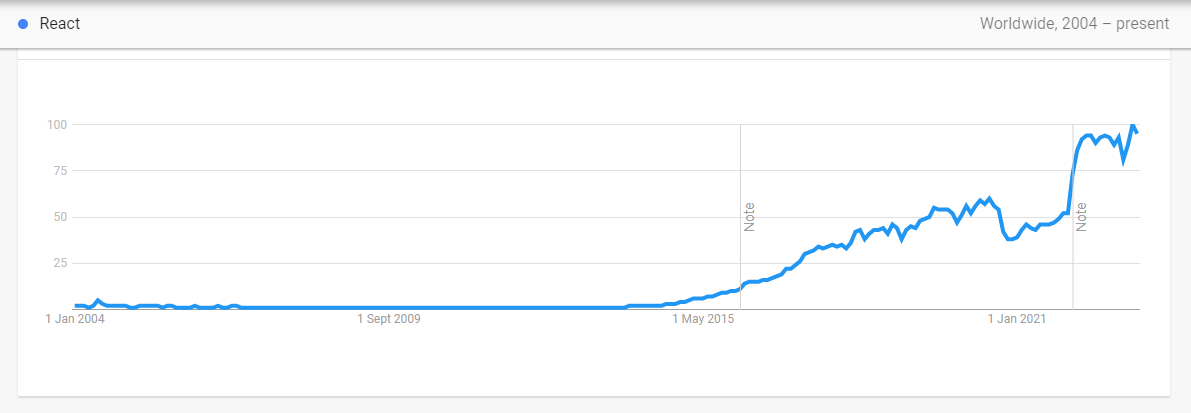
Since its initial release, React has gained popularity randomly and continued to grow ever since, revolutionizing the world of Web Development. In present days, it is being used by some of the biggest names in the tech industry, including Pinterest, Meta, Instagram, Netflix, Shopify, Discord, Dropbox and many more.
ReactJS Google Trends from 2004 - Present
Traditionally, the front-end landscape was very different. We just had basic HTML, CSS and JavaScript where HTML displayed the text on the Web page, CSS the styles and JavaScript allowed us to have some interactivity in a website. Additionally, when a user clicked a URL, we used to request these three files from the server (or backend) but there was a problem with that. Different browsers were being used to run the websites and developers had to account for all the different browsers as much as they wanted to use more and more JavaScript. This is because each browser had been built by different developers.
Eventually, jQuery came out, which allowed developers to easily interact with the DOM across all browsers. It had a unified, easy API that took care of all the complexity of manipulating the front end across different browsers. Developers started building bigger and bigger applications and as websites started turning into full applications, BackboneJS was 'born' which was also a library that allowed us to organize JavaScript files. As it became easier and easier to work with the DOM, we had the birth of single-page applications.
Developers focused less on HTML and more on JavaScript where instead of us making new requests to the server after each click, one would interact with that application without ever speaking to the server anymore, and in 2013, Meta (formerly Facebook) released ReactJS at JSConf which became the most popular tool with the most job demand across the world.
Growth
Since its release, React JS has had a thriving community of passionate developers who are constantly pushing the boundaries of what's possible with this powerful technology.
From innovative tools and libraries to cutting-edge tutorials and support forums, there is an abundance of resources available for anyone who wants to learn and master React JS. Therefore, not only will you have access to one of the most exciting and innovative technologies out there, but you'll also have a wealth of support and inspiration to help you take your skills to the next level.
As I will be wrapping up this article-series, I will mention a few of the best resources to help you kick-start your journey in learning React JS and have a clear path to success in taking your web development skills to the next level.
But how much JavaScript do I need to get started in React?
To have a good grasp and an easier path in learning React, you just need to have basic JavaScript skills at your fingertips. This includes knowledge of how to work with:
Data types
Variables
Basic Operators
Logic Operators
Functions
Objects
Loops
DOM Manipulation
Arrays
ES6 Modern Syntax
Object Oriented Programming
Asynchronous JavaScript
and Modern JS Development (Modules, and Tooling)
To learn the above JavaScript skills, I would highly advocate for the Complete JavaScript Course 2023: From Zero to Expert! by Jonas Schmedtmann on Udemy which is a paid course, or use (one of the full-course-tutorials) in the free JavaScript Tutorials Playlist by freeCodeCamp on YouTube.
What made React so great and Why React instead of 'Just JavaScript' (Vanilla JS)?
Vanilla JS is used to refer to pure JavaScript (or we can say plain JavaScript) without any type of additional library. Vanilla JS works and is at times a good choice but the downside is that it can also reach its limits. One of the reasons is that using vanilla JS, you have to write every single step that should be taken as you design a program; Every single step has to be described. This way of programming is called an imperative approach; Describing action after action, and step after step.
In programming and Software Development in general, we have a principle aimed at reducing the repetition of software patterns, replacing it with abstractions or using data normalization to avoid redundancy referred to as DRY (Don't Repeat Yourself). However, using the Vanilla JS imperative approach, we end up reinventing the wheel over and over again; Doing repetitive tasks by repeating code that does the same task over and over again.
React on the other hand makes use of Components, which are independent and reusable bits of code. They serve the same purpose as JavaScript functions, but work in isolation and return HTML. React is therefore about splitting your application into small building blocks (small components), where every building block (every component) has its specific task and can be reused in the program making your code maintainable and manageable. ReactJS, therefore, makes building modern, rich, complex user interfaces way easier by giving us a higher-level syntax where we write code in a Declarative, component-focused approach.
React Components
React is designed around the concept of reusable components which was a big game changer.

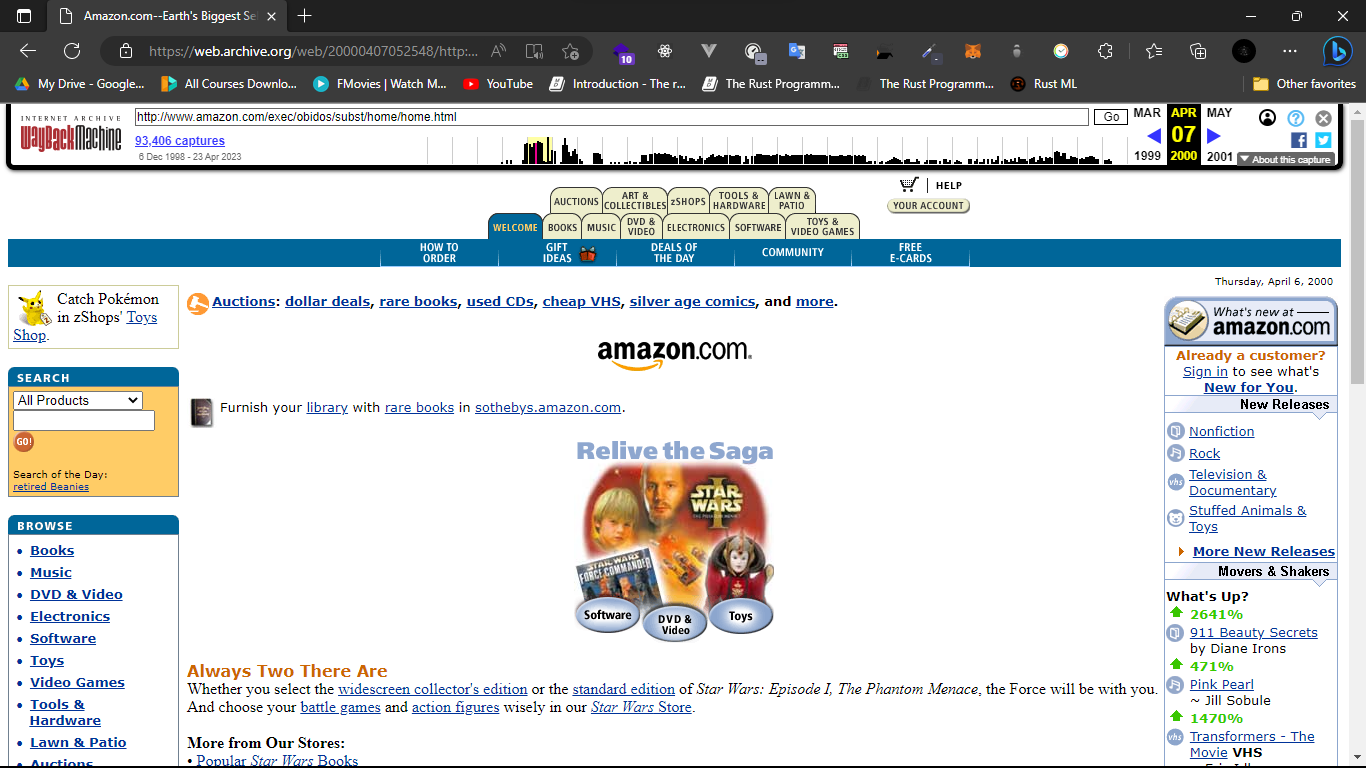
Using the image above of the Facebook website (some years ago), each square or rectangle section is an individual component where after bringing all the components together, we get the complete website as a whole. A component is a self-contained piece of code that returns some virtual UI representation of HTML. This borrows the concept of working with Lego blocks. Example, we have the Navigation Bar component and the News Feed component in the image. We can also have components within components where a component like a Profile Picture component or Button component can be surrounded by a bigger component like the News Feed component. Each of these components works together to eventually have our whole working web app. The advantage of having these components, as mentioned before, is that they can be reused in different locations in the project.
We'll however dive deeper into components later in the article-series.
Data Flow in React
So far, we understand that React is just a JavaScript library that allows us to write more JavaScript to have interactivity on our websites. In React, data flow refers to how data is passed between components. React employs a one-way data flow or unidirectional data flow. It is sometimes referred to as the one-way data binding model.
In a unidirectional data flow, as the name goes, data flows in a single direction, which is from a parent component down to its child components. Example, we can have a Button component inside a News Feed component. The News Feed component is the parent component while the Button component is the child component, hence data can be passed from the News Feed component to the Button component. This means that data changes made in a child component cannot directly affect the data in its parent or sibling components.
In React, this is achieved by passing data down through props (which we'll discuss and put into practice later). Props are essential properties that can be passed down from a parent component to its child components. Once a child component receives props from its parent, it can use those props to render itself. In our example above, the News Feed component can pass data down to the Button component through props.
If the child component needs to modify the data it has received from its parent, it can do so by raising an event but we'll also discuss how this happens later.
This unidirectional flow of data helps to keep the application's data model simple and also makes it easier to debug the application, as changes to data can be easily traced back to their source.
Now because things get easier with React, and because we can build those rich user interfaces with React and JavaScript, when working with React we often build so-called Single Page Applications as mentioned in the 'React History' section above. This means controlling the entire page with React, hence when a link is clicked and a new page is loaded, it looks as if one switched a page, but instead, one does not request a new HTML file from some server.
Instead, JavaScript is used through React to change what's visible on the screen where after the initial request, React takes over and controls what we see on the screen, which often leads to a smoother UI and a better user experience.
As we wrap up the Introduction section, it is worth noting that ReactJS has alternatives.

The alternatives include Angular, VueJS, Svelte, and many more. Each alternative however has an advantage and a disadvantage over the other and it is advisable to learn and master one first before getting to the next one (if need be), instead of learning any 2 or more simultaneously.
Fundamentals
create-react-app
Yes, you saw that right, CRA haha... If you are a newbie in React, you might wonder why I have that statement in the first place. Let us first understand what create-react-app is then break everything down as to why we possibly no longer need/use CRA but rather its alternative Vite.
What is create-react-app (CRA)?
CRA is an officially supported way to create single-page React applications. It offers a modern build setup with no configuration.
It is a tool that generates a new React site for us along with all of the configuration and dependencies it needs to run. This means it does all the heavy lifting for us when creating a new React App.
To better understand CRA, let's first see it in action. Steps on how to run your first React app with CRA:
The first step before using CRA is to have Node >= 14 installed on your machine.
This is because while using CRA, we use the node package manager (npm), to run and build our app.
Package Managers are tools that enable the automatic installation, configuration, and deletion of software modules, or packages.
To install Node, go to the official NodeJS site and download an installer as per your operating system and follow the step-by-step installation process after the installer download.
After installing Node, open the terminal and run
node -vand if Node is successfully installed, it should display the Node version installed on your machine. Example :v18.15.0After Node is successfully installed on your machine, run the following CRA command in the terminal:
npx create-react-app my-appIn the code above,
npxis an npm package runner but has added advantages over using npm. It is a part of the node package system, which temporarily downloads a node package for us and then runs it without explicitly installing it.create-react-appis the command that generates our first React App thenmy-appis the name of your React App or project (You can use any other different name).After
my-appproject is generated, while still in the terminal, type the following commandcd my-app(which means we 'change directory' and get into our app'smy-appdirectory) then typenpm startwhich will start the development server (the starting script can be found in thepackage.jsonfile - file explained below in the 'structure walkthrough' section).Then open http://localhost:3000/ to see your app (Works only after the above process is completed successfully as shown below).
After opening the app in the local host using a browser of your choice: http://localhost:3000/, the page will look like the one below:

Ta-daa, you have your first React App running on your local machine. Let us now open the app (
my-app) in any text editor or IDE of your choice (I prefer Visual Studio Code - VS Code).
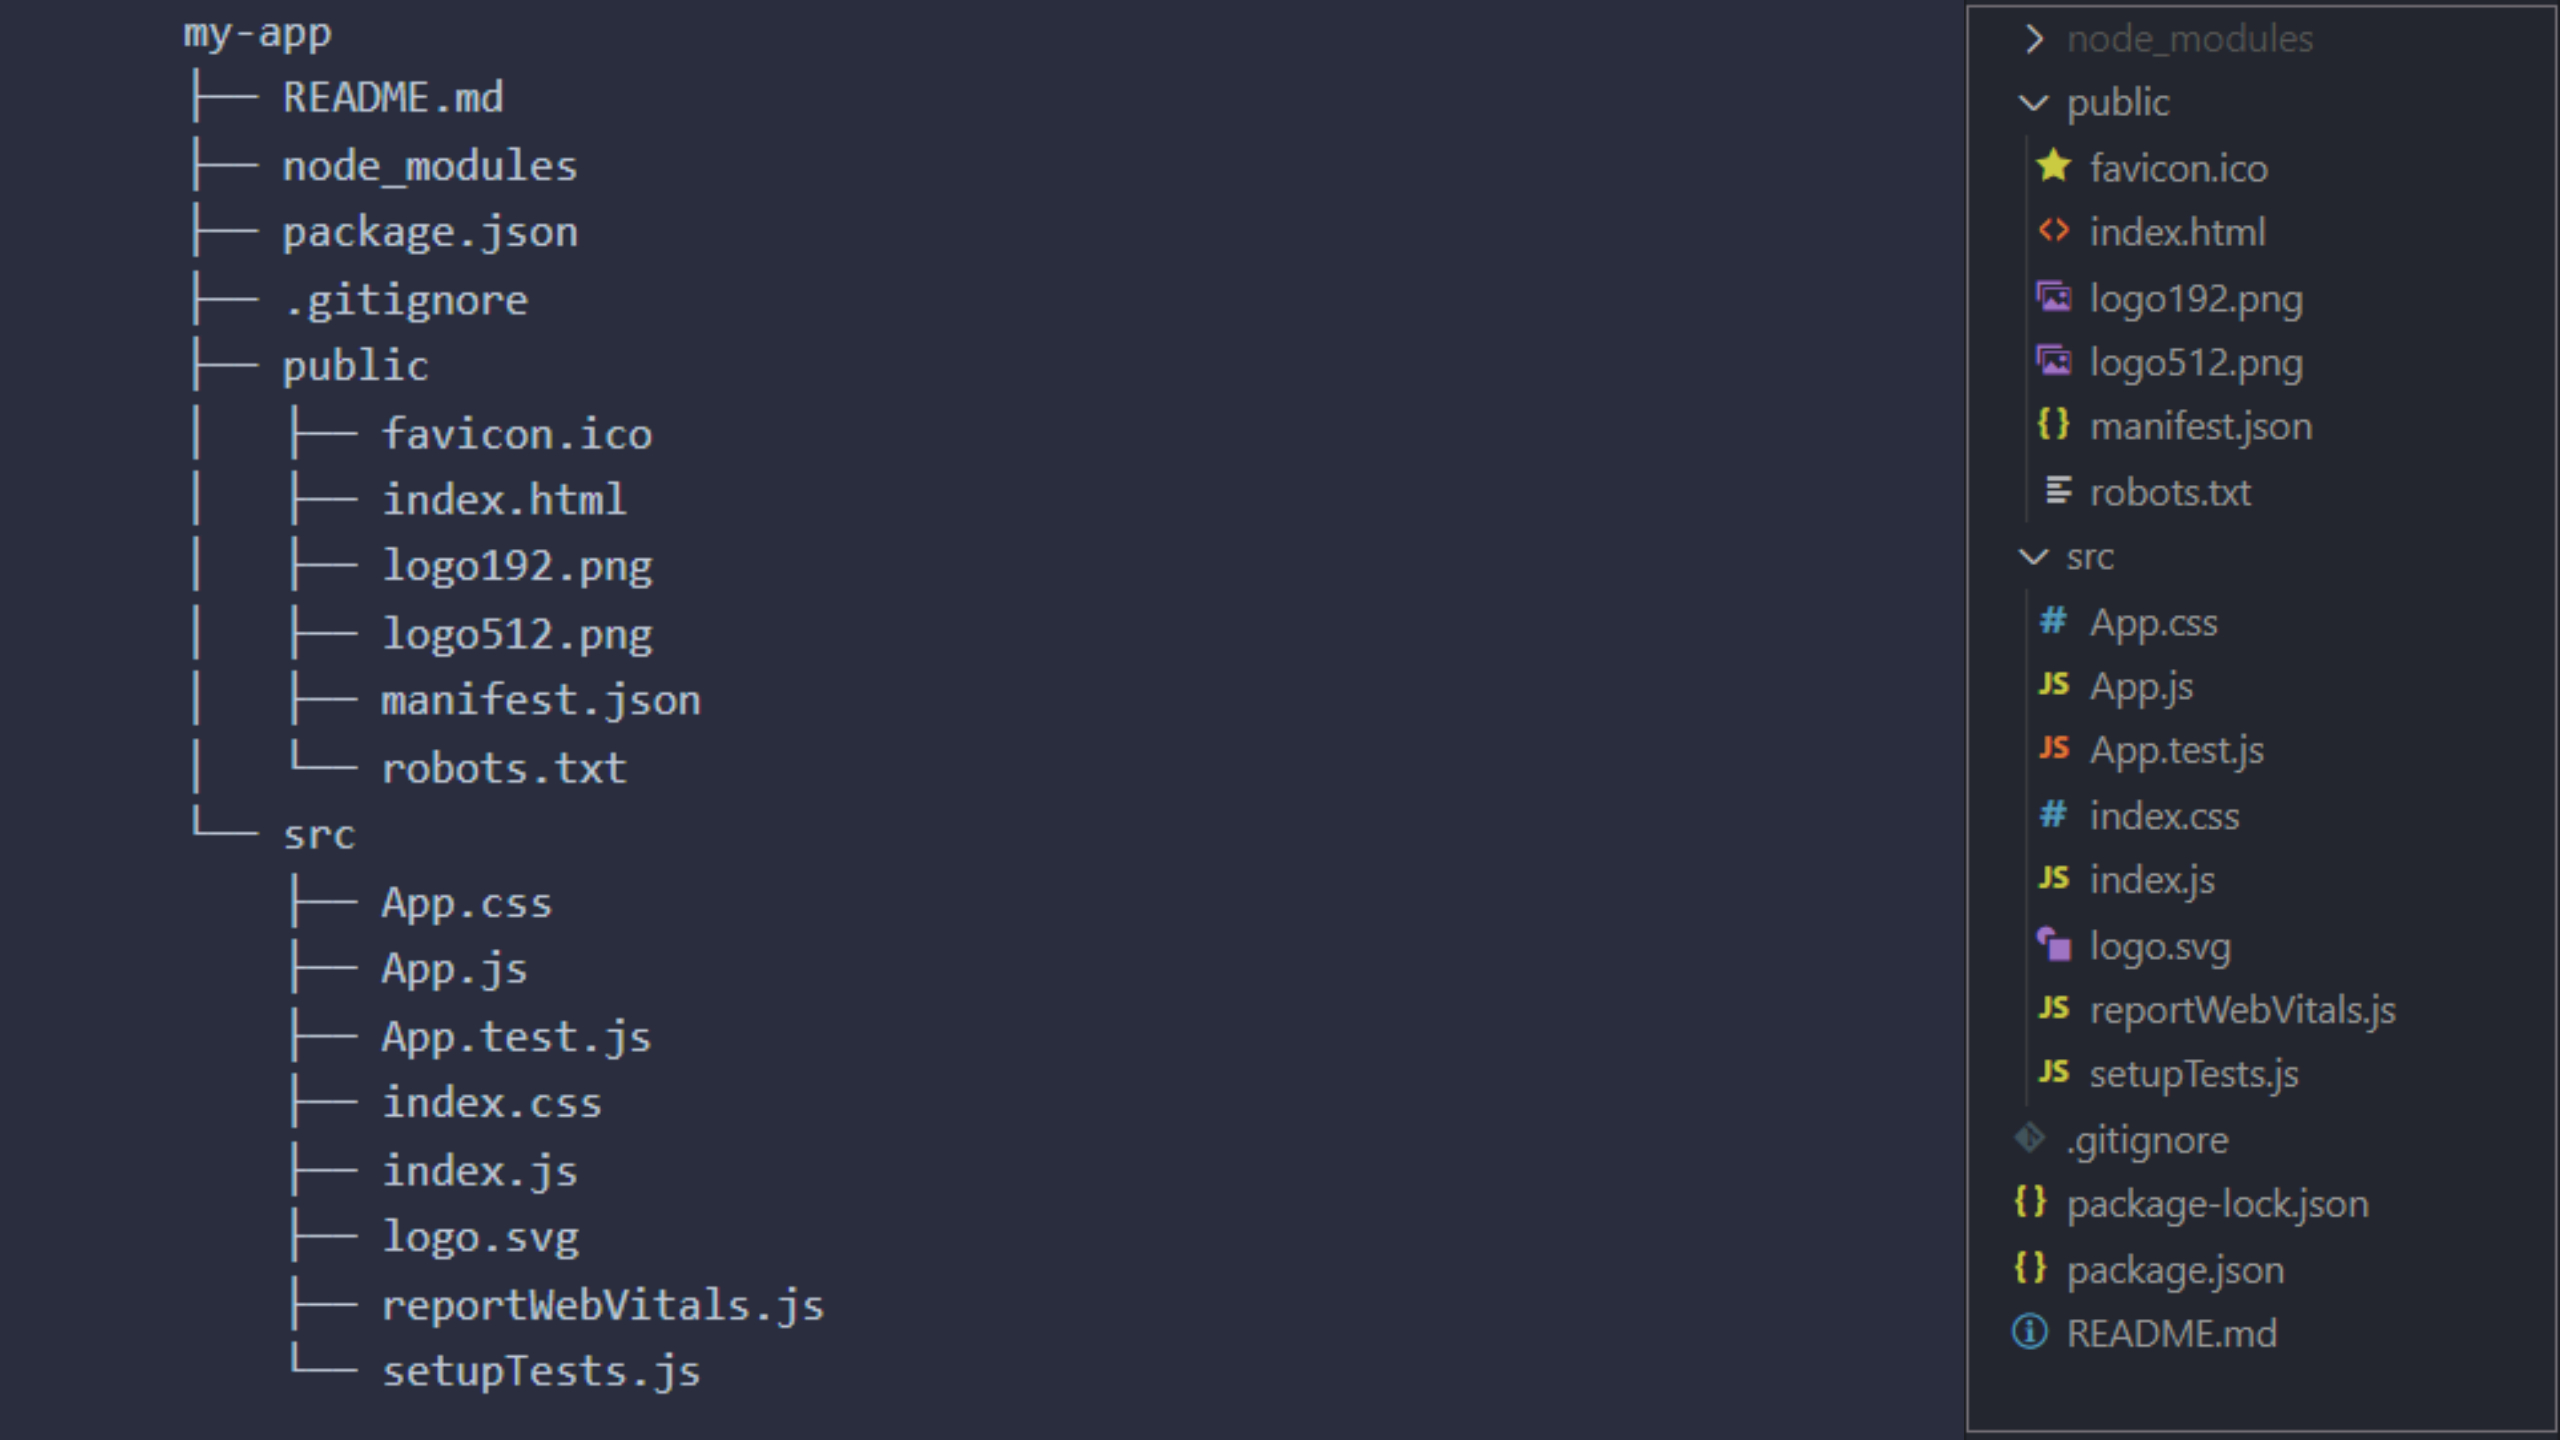
In VS Code (or in any text editor or IDE of your choice), the folder structure of the app will appear as in the image below:
Structure Walkthrough
node_modules
The first directory is the node_modules directory. This is a directory that stores all of our project dependencies and node packages.
The React library itself is a node package, and it's kept inside this directory which includes any other packages that one will install in the future will also be stored in this node_modules directory.
public
Next, we have the public directory. This directory contains static assets or files and will be made public to the browser, such as the HTML file(s), icon(s), images, and fonts. When you run
npm start, this directory is served as the root directory of your app. Examples of files include thefavicon.cowhich is the icon shown in the browser tab, therobot.txtfile which is for communicating with search engine crawlers and web scrapers, themanifest.jsonfile which contains a bunch of information about our project and is primarily used when a user wants to install a progressive web app. We also have a HTML file,index.html, which is the single file served to the browser when the app is loaded; where our React application will be injected into the page (more explanation below in the course of the article).src
The src directory is the directory that contains the source code for the React application. This is the directory where we build components. When our app is compiled, it's all the files in the src directory that get compiled into a JavaScript bundle.
In the src directory, we have different files as well:
App.jsfile - This is the main component that is rendered to the DOM when your app is loaded. It contains the logic and structure of your app.App.cssfile - This is a file used to style the components in the app.index.cssfile - This is the global stylesheet where styling is done globally in the entire app.logo.svgfile - This is an image in the form of an SVG being used in the App component.index.jsfile - This is the file that kinda kickstarts the React application. It is the entry point of any React application as it importsApp.jsand renders it to the root element inindex.html.App.test.jsfile - Used for writing tests for the App component.setupTests.jsfile - Needed for the test files to work by importing a testing library.reportWebVitals.jsfile - This allows us to measure the performance of the React application by analyzing certain metrics.(For the start or as a beginner, one does not work with the
App.test.js,setupTests.jsandreportWebVitals.jsfiles, which are used at a more advanced level, hence one can delete the files and also delete their import statements in theApp.jsandindex.jsfiles.)
Additionally, we have more files in the root of our directory:
.gitignorefile for version control which tells Git which files or directories to ignore and not track eg the node_module directory.package.jsonfile - This is a file that tells any developer working with the application the different libraries or packages that the project needs in order to work. In other words, it is used for tracking dependencies or packages and their versions for each specific project created with CRA. It contains information about the project, including its dependencies that are stored in the node_modules directory, scripts like building, testing, or deploying your app, and other metadata.README.mdfile - This is the file used to describe what the app does, how to install it, how to use it, and any other relevant information.
Vite > CRA
What is Vite? Vite, like CRA, is a build tool that is designed to be fast and optimized for modern web development workflows. It too generates a new React site for us along with all of the configuration and dependencies it needs to run hence doing all the heavy lifting for us as well.
Vite works like CRA but has added advantages:
Speed - Vite is blazingly fast as compared to CRA. This is because it uses a new generation of build tooling that leverages modern JavaScript features hence significantly reducing the time it takes to build and reload your app during development, as compared to CRA which uses a more traditional build process that is slower, especially for larger applications.
Flexibility - You can easily tailor it to your specific needs as it was designed to be highly configurable and customizable.
Performance - Vite has a smaller build output than CRA hence improving the performance, and loading time of your web application.
But how do we create our first react app with Vite?
For CRA, we saw that we use the command: npx create-react-app my-app to generate a new React app.
For Vite, we use: pnpm create vite@latest. Before we expound more on the command(s), I've just introduced another tool here. We have seen npm and npx before, but now we have pnpm. pnpm is also a package manager but faster than npm. You can learn more about pnpm in the pnpm official documentation; how to install it and why it is preferred over npm. However, you can still use npm: npm create vite@latest.
After you run pnpm create vite@latest in the terminal, you are prompted to add the Project name, the default being vite-project.
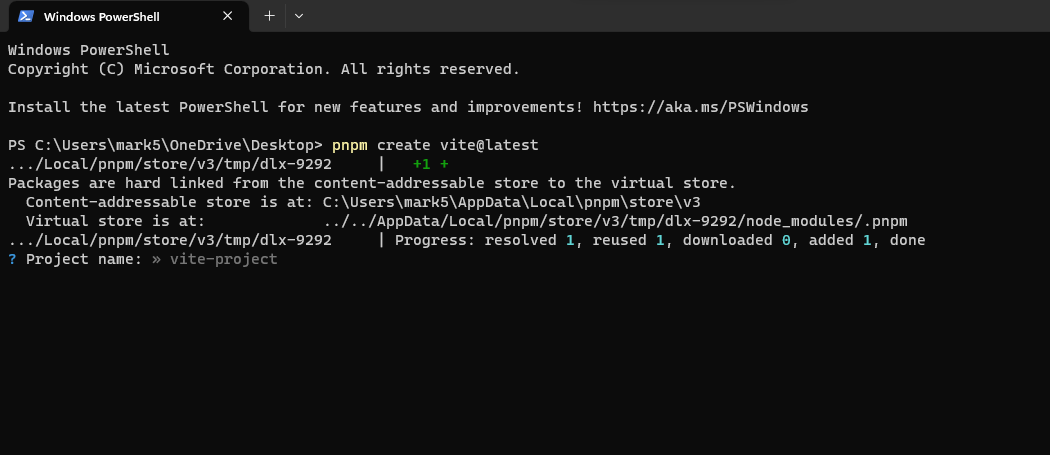
We are still gonna use our project name as my-app then click Enter.
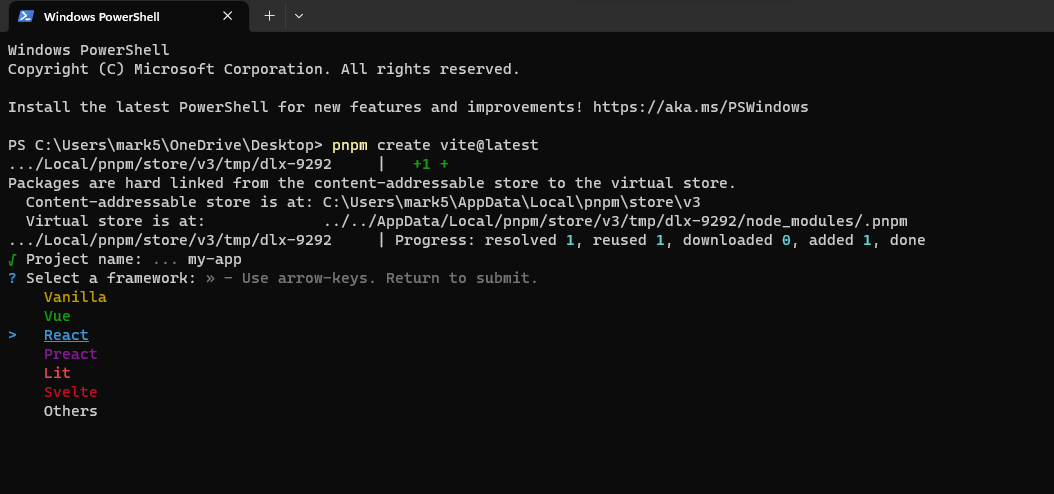
After adding the project name, we are prompted to select the framework we are to use in our project. Vite supports several libraries \ frameworks as shown in the image above but because we are using React, we will select 'React'.
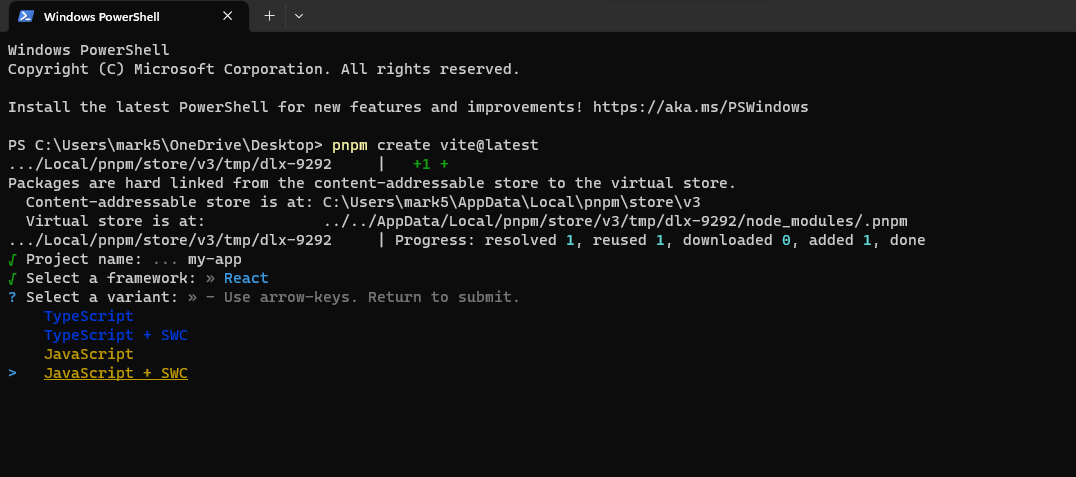
After selecting 'React', we are to select whether we are to use React with TypeScript or JavaScript. We are to select JavaScript for this project. However, we have two options for both JavaScript and TypeScript; we have one with JavaScript and the second option with JavaScript + SWC. SWC is a transpiler for JavaScript / TypeScript that is written in Rust and is much faster than Babel (JavaScript option with no '**+ SWC' uses Babel), used for both compilation and bundling. Rust is known for its performance and reliability, hence for compilation, SWC takes JavaScript / TypeScript files using modern JavaScript features and outputs valid code that is supported by all major browsers 20x faster than Babel. It speeds up the development, production builds and outputs smaller files hence much faster than Babel.
You can check the article: Why you should use SWC (and not Babel) by Kasra Khosravi for more information on the differences and advantages of SWC over Babel.
After selecting JavaScript + SWC, our app (my-app) is generated.
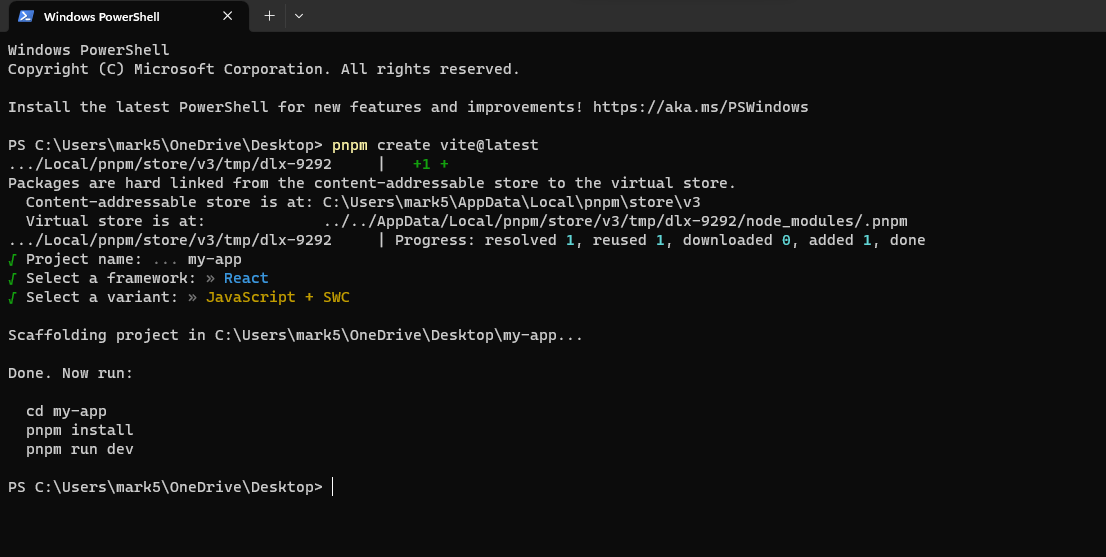
The same process we used as we were working with CRA, we'll 'change directory' cd my-app to get into our projects directory. Secondly, we're to install our projects dependencies with pnpm install or npm install (depending on the package manager you initially preferred to use). Then to run our project, with CRA we were using npm start but for Vite, we are to use pnpm run dev or pnpm dev (the starting script can be found in the package.json file - file explained above in the 'structure walkthrough' section)
After running pnpm run dev or pnpm dev the development server for our application (my-app) is typically started and we can open our web app on our local machine, the same way we did in CRA, but this time, vite provides a different local host port. eg: http://localhost:5173/.
Opening our project in VS Code (or in any text editor or IDE of your choice), the folder structure of the app will appear as in the image below which is almost similar to the CRA folder structure:
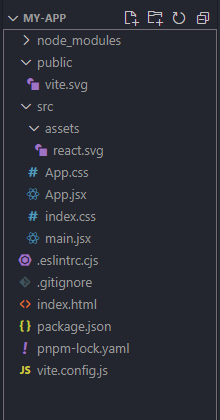
However, in Vite's folder structure, some files (which are not so-used files but can be added manually if need be) like the test files are not generated. Secondly, in CRA, JavaScript files have a .js file extension while using Vite, files have a .jsx extension, a JavaScript extension we'll cover soon. Additionally, the entry point of any React application built with Vite is the main.jsx file which works the same as the index.js file in CRA.
React Basics
We've covered how we can create our first react app with both CRA and Vite. Let's now get deeper into working with React. Create your React app: (I highly advocate using Vite as explained above): pnpm create vite@latest, give the project your preferred name and open it in your preferred IDE or Text Editor.
For my case in this article, I'll be using Visual Studio Code as my Text Editor and my-app as my project's name.
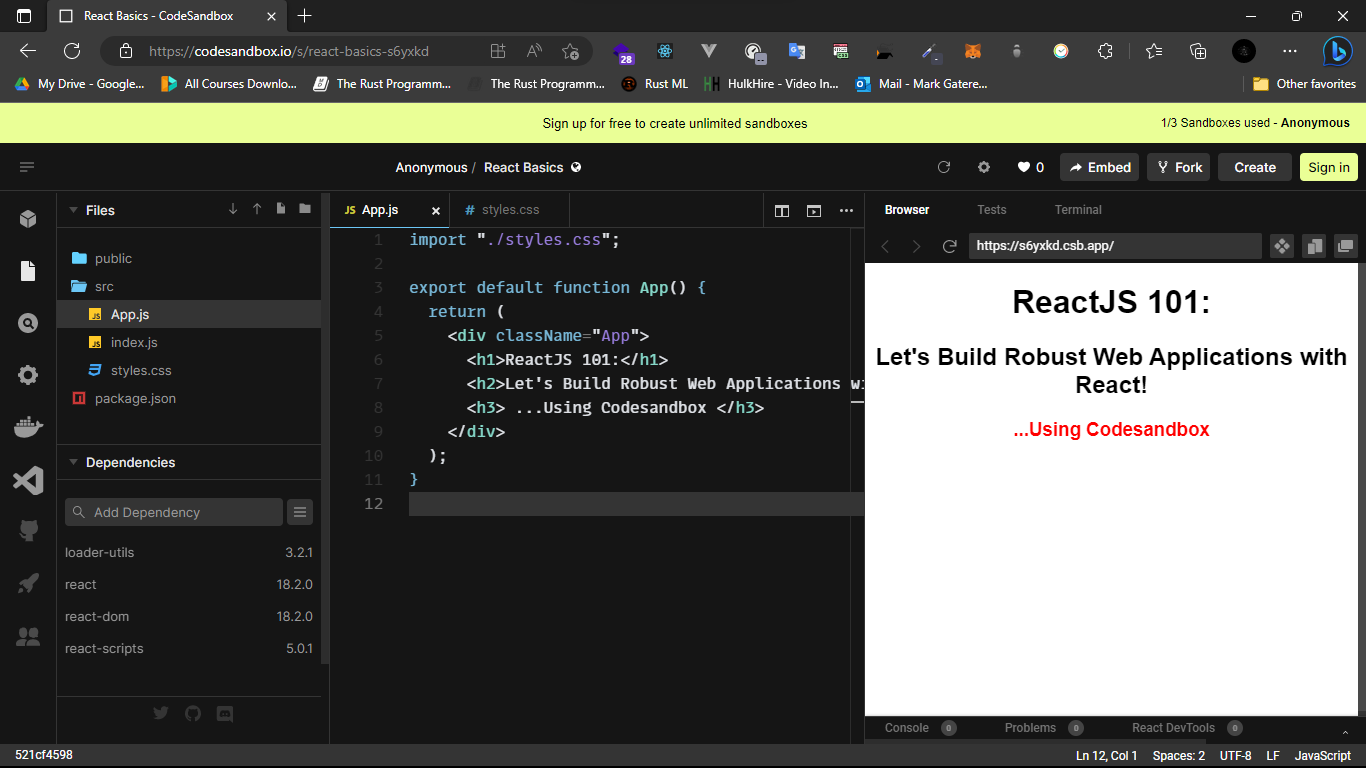
Point to Note: Besides using your Text Editor and local machine to work with React, there's also an option of using your browser (online) on a platform known as Codesandbox to work with React but on an online Sandbox. This is an awesome platform to even test your React code for smaller projects.
Before getting into basics, did I mention the React Documentation? No, I didn't... The React Documentation is an incredibly comprehensive and well-written resource that covers everything from the basics of React syntax, and installation to advanced topics like working with built-in React Hooks and APIs. I highly advocate this unparalleled resource for learning and diving deeper into React.
Buckle up and let's kick off!!
After creating your project and opening it in your preferred browser, let's head over to the index.js file for those using CRA or main.jsx file for those using Vite:
(I'm using Vite and below is the code in the main.jsx file)
import React from 'react'
import ReactDOM from 'react-dom/client'
import App from './App.jsx'
import './index.css'

ReactDOM.createRoot(document.getElementById('root')).render(
  <React.StrictMode>
    <App />
  </React.StrictMode>,
)
Let's break the above code down so that we can understand why we refer to this file as the entry point of our application.
After starting our development server, pnpm run dev, what happens under the hood is that, first, the main.jsx file imports a couple of libraries, which include the main ones which are React and ReactDOM. Both of these libraries are very critical in order for our React application to run. React is kinda the underlying engine that does all of the work when it comes to how React functions as an application builder. Anytime we write JSX code (as we will cover in a few) like <MyComponent /> or <App />, this JSX code is transpiled to a call to React.createElement(MyComponent) or React.createElement(App), respectively. Hence, in order to have access to the React object in our code, we need to import it: import React from 'react'. The React.createElement() function allows us to use JSX syntax and have it transpiled to executable JavaScript code that the browser can understand.
Secondly, ReactDOM is related to the DOM we've been mentioning previously, which is the Web DOM. Being that React is the engine that runs how these applications get built, React Dom is specifying that the engine should be directed toward web-related applications. These two libraries combined is what allows us to build out all of our web application in React. You might be wondering, well, are there other React-related libraries for building out other things? Yeah sure, we have React Native which is for building native mobile applications using React as well as the underlying engine and also a virtual reality application tool, React VR, that you can build, also leveraging the React engine. So that's why for our web application, we want both React and ReactDOM.
We no longer need to import React and ReactDOM in our JavaScript files anymore. Wait, what are you saying? You just mentioned that we need to import the React engine and a library to specify that the engine should be directed toward web-related applications. Yes, We no longer need to import React and ReactDOM in our JavaScript files anymore. This is because when React 17 was introduced, it has a new JSX transform feature that allows us to use JSX without importing React and ReactDOM. However, if one is using an older version of React, one still needs to import React and ReactDOM. Hence, we can do away with both lines of code in our main.jsx file since we are using the latest version of React:
import App from './App.jsx'
import './index.css'

ReactDOM.createRoot(document.getElementById('root')).render(
  <React.StrictMode>
    <App />
  </React.StrictMode>,
)
We also import the App component from the App.jsx file where the main component, App component, is rendered to the DOM when your app is loaded (as explained in the 'structure walkthrough' section). We also import the index.css file which is the global stylesheet with our styles for our app at a global scope.
Let's now understand how the code below works:
ReactDOM.createRoot(document.getElementById('root')).render(
  <React.StrictMode>
    <App />
  </React.StrictMode>,
)
Explanation in a nutshell, "Leveraging the ReactDOM library, we want to render our App component <App /> and mount it in an HTML document element with the ID 'root'." This is happening / the element with the ID of 'root' is in the index.html file which is in the public directory.
<!DOCTYPE html>
<html lang="en">
  <head>
    <meta charset="UTF-8" />
    <link rel="icon" type="image/svg+xml" href="/vite.svg" />
    <meta name="viewport" content="width=device-width, initial-scale=1.0" />
    <title>Vite + React</title>
  </head>
  <body>

    <div id="root"></div> <!-- The HTML element with the root ID -->

    <script type="module" src="/src/main.jsx"></script>
  </body>
</html>
What is happening is that our entire React application, which we can also refer to as the main App component is rendered into the div with the root ID. Hence, while in the browser, all the elements in other components or the main App component will be located in between this div with the 'root' ID.

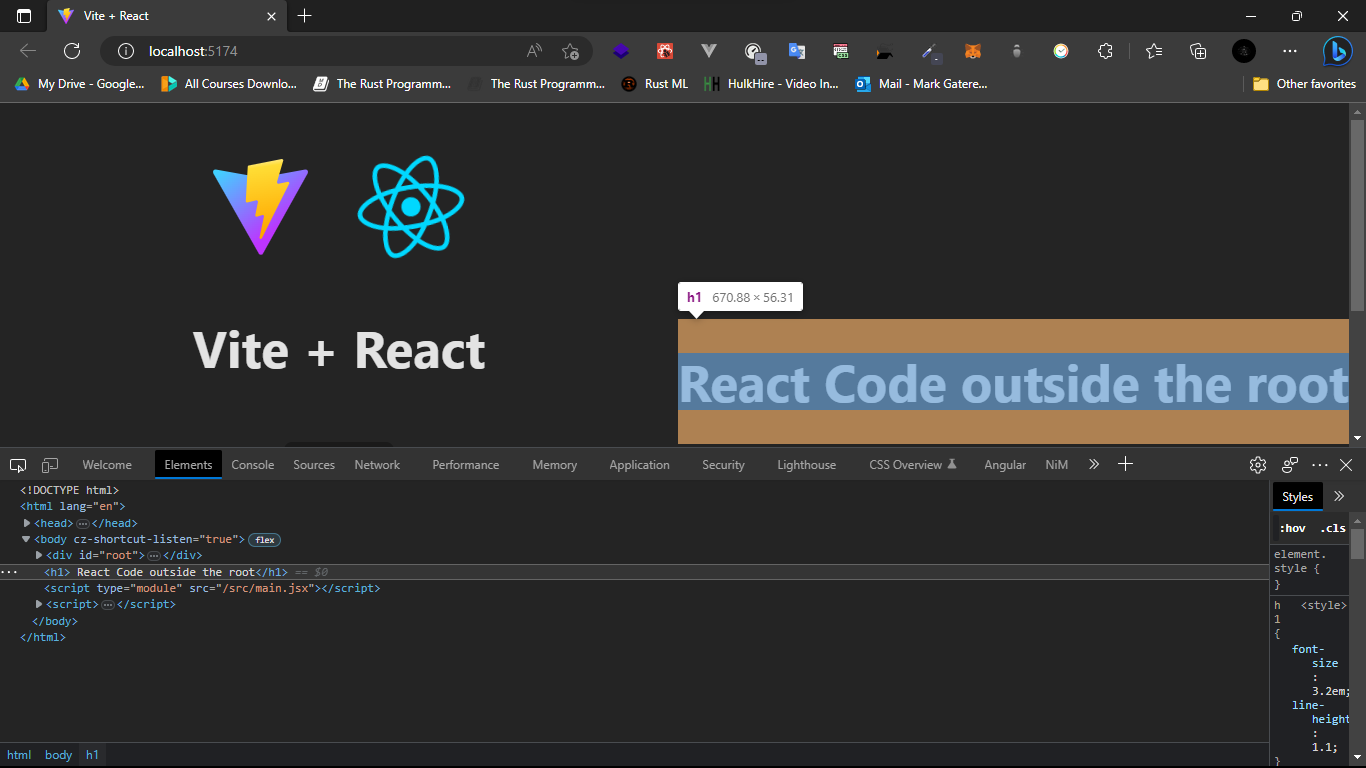
To see this in practice, in case we add a new element below the root div element in our original project, (my-app) and run the development server:
<!DOCTYPE html>
<html lang="en">
  <head>
    <meta charset="UTF-8" />
    <link rel="icon" type="image/svg+xml" href="/vite.svg" />
    <meta name="viewport" content="width=device-width, initial-scale=1.0" />
    <title>Vite + React</title>
  </head>
  <body>

    <div id="root"></div> <!-- The HTML element with the root ID -->
    <h1>React Code outside the root</h1>
    <script type="module" src="/src/main.jsx"></script>
  </body>
</html>
In our browser developer tools, we then see that the h1 element was not rendered in between the root element but in the body tag and in its separate h1 tag:
The <React.StrictMode> is a useful development-only tool for identifying potential problems in a React application, especially during development and testing to identify potential problems in a React application. By wrapping the main App component of our application in React.StrictMode, we can get additional warnings and checks that can help us write more robust and maintainable React code. It should however be used during development and removed in production builds. This is because the additional checks and warnings can add some overhead to the application, which can affect its performance.
Using Stylesheets
In our src directory, we have index.css and App.css files that we kinda explained above but let's now see how we can work with these files.
The index.css file is the global stylesheet for our entire website that is used to hold basic styles for common elements or classes that are used in many different places in our application. Examples include heading styles, button styles, body styles etc. This index.css file is then imported into the main.jsx file, the file that kick-starts our React application, then it is effectively injected into a style tag on the HTML page in the browser.
The App.css file is a stylesheet for our components, where different components eg, News Feed Component or Navbar Component are styled. Splitting our stylesheets into global and component-specific stylesheets makes it easier to manage our application especially as it starts to get larger and we start adding more and more components. Having one gigantic stylesheet may become messy and hard to update.
However, it's worth noting that even component-specific styles are also kinda treated as global styles and hence are placed in the head of the HTML page as a style tag too so they can apply styles to anything or any component on the page.
There's more to styling a React application than just the two options above which we'll dive deeper into later in the article. (For this section, let's focus on the basics of using stylesheets).
Using Images
Let's now discuss how we use images in our JSX file(s). There are two ways how we can use images in our React application.
Using our my-app project, we can add images to the public directory and use them from there. As we mentioned above, anything placed in the public directory will be made public to the browser or is available at the root level of the domain. So if we place an image inside there, then we can just reference it in our image tags without the need of importing the image.
<img src="/vite.svg" className="logo" alt="Vite logo" />
The second option is using the src directory. We can create another directory (however it already exists in our current Vite project) known as assets where we can place all our images. This is for easier management of our files in our src directory. Files placed in the src directory have to be imported hence to use our images in our JSX files/components, we have to import them at the top. We then use curly braces to refer to the image files in our image tags since we're outputting something dynamic. In React, when we want to output dynamic content or expressions within our JSX code, we use curly braces { } to enclose the dynamic content.
import reactLogo from './assets/react.svg'
<img src={reactLogo} className="logo react" alt="React logo" />
But which way is the better way? There's no better method than the other, however, if one is using an image outside the scope of React which means somewhere else on the HTML page outside of the root element where the application is injected, or even when using site-wide images that might be used in many different places, one can use the public directory. But for images that are used in specific components, one can use the src directory.
Before we wrap up the basics section, let's first check out one key tool we ought to know of, which is the pnpm build command. Opening our package.json file, in the scripts section we have the following scripts:
"scripts": {
  "dev": "vite",
  "build": "vite build",
  "lint": "eslint src --ext js,jsx --report-unused-disable-directives --max-warnings 0",
  "preview": "vite preview"
}
We've worked with the dev, pnpm dev, script. The built script, pnpm build, is the script used to build our project and generate a set of optimized static assets that can be deployed to a web server. After running the pnpm build command in the terminal while in our projects directory, a directory similar to the one below will be generated with optimized files ready for deployment.
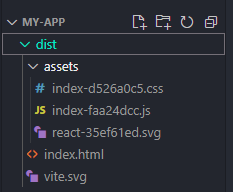
The resulting assets after the build process is complete are ready for deployment and can be served by a web server or a cloud-based service.
Milestone wrap...
Aha! We are done with the first milestone of understanding 'What is React and Why React?' We have also covered some terminologies in React like React components, create-react-app, vite, scripts and many more. 🥳
This is just but the start of our learning React series, and we are yet to dive into the juicy bits of React. In the next section, React 102, we will dive deeper into working with React components, React hooks, and much, much more...
Are you excited? I am excited 🚀
See you then 🤗


