Leveraging Hashnode’s GraphQL API to build a DevCard - #APIHackathon
How I developed a Hashnode DevCard with the Hashnode's GraphQL API

I am a Committed and Motivated Tech optimist, whose passion lies at the intersection of Technology and Innovation.
Introduction
"Where is the live app, we test it out first?
I know you would like to first test the app out, but's let's first learn the reason behind coming up with this project for the #APIHackathon... 😉 Alternatively (an alternative I wouldn't advocate for 😂 ) , you can rush to the Frontend section (where we start building the application's UI) and get the live project link from there, or in the project's GitHub repository below:
A gentle heads-up: This blogpost is a bit long, but don’t worry, we’re going to make it fun and engaging! To help you navigate through the content, I’ll be using analogies along the way, to add some humor and make complex concepts easier to grasp.
Set? Let's gooo... 🚀
I often find myself on Hashnode browsing articles I can read, or at times just contemplating my pending draft posts - that are yet to published 😂. This day, I get into hashnode and find a pinned post that caught my eye, "Hashnode APIs Hackathon", and I was intrigued to get into the details of this Hackathon. I opened the post and to my excitement it was a competition to build any project / integration by leveraging Hashnode's APIs. Believe you me, rather than seeing it as a competition, I saw it as a learning opportunity.
What am I to build? I had no idea in mind. Looking at the provided ideas in both categories, at the Hackathon's page: Smart Home integration, A cloudflare worker that installs Hashnode on your domain subpath, An interface suitable for running a newsletter blog etc. given the time constraints, they sounded a bit complex to be done at the moment... and I was 'successfully' left with no idea to work on 😂.
I had worked with APIs before, including a simple GraphQL API project that wrapped the ChuckNorris.io API and a React frontend consuming the GraphQL API. I therefore decided to go with Category #1: Build an interesting integration using Hashnode's GraphQL APIs. That didn't bring any project idea in mind though, haha.
I decided to first work on the backend, publication query that fetched published blogposts data from Hashnode, hoping that an idea would pop in mind as I am fetching the data 😅. I set up a publication query (backend) as per their documentation (will be getting into details inna few) to fetch a Hashnode users' publications, the query was ready and I was set to go; ...but to go where? 😂.
I found myself pondering, "What should I do with this data? Should I build a nice UI that displays the blogs of a Hashnode user? But that idea does not stand out since Hashnode already has a super impressive UI, additionally, they give you a choice of your preference on 3 different layouts: Magazine Layout, Stacked Layout and Grid Layout 🔥 ...hence I rule out this idea. Integrating AI seems like an interesting challenge, but that might take some extra time." I was at a standstill, with no clear idea in sight.
In my quest for inspiration, I decided to just go through Hashnode's API documentation and just explored different queries one can work with. As I was going through the user query, an idea spark in mind. I recalled githubunwrapped, a platform where one could get a very nice review of their coding year by just entering their github username... "This is it 🥳"... Long story short, in the course of me thinking how I could integrate a similar approach in this case, the idea of building a Dev Card based on the user's activity on Hashnode emerged 🎉.
Building of the project
Yeah, by default, I needed data that I could use to create the Dev Card with. Rather than starting with placeholder data for the frontend and integrating the backend later, I decided to begin with the actual data from the Hashnode API. This approach would save time by eliminating the need to adjust the placeholder data to match the API data, hence started with the Backend.
Backend
On the backend, I decided to use NodeJS... cause why not 😂? NodeJS is however a popular choice for server-side development, and I had also previously been working with it.
As mentioned above, I started with the publication query where I could fetch different posts based on the host url (The host of the publication eg. gateremark.hashnode.dev) but changed the entire query to user query where I could retrieve more comprehensive details about a user, such as their username, profile picture, badges, and more, all based on their Hashnode username; for the Dev Card.
Let's now get into the backend code:
import { ApolloServer } from "@apollo/server";
import { startStandaloneServer } from "@apollo/server/standalone";
import axios from "axios";

// GraphQL schema
const typeDefs = `#graphql
    type Query {
        user(username: String): User
    }

    # User Schema
    type User {
    username: String
    profilePicture: String
    badges: [Badge]
    followersCount: Int
    isPro: Boolean
    posts(page: Int, pageSize: Int): Posts
    tagsFollowing: [Tags]
    location: String
    socialMediaLinks: SocialMediaLinks
    }

    type Badge {
        id: String
        name: String
        image: String
    }

    type Posts {
        edges: [Edge]
    }

    type Edge {
        node: Post
    }

    type Post {
        title: String
        url: String
        publishedAt: String
    }

    type Tags {
        name: String
        logo: String
    }

    type SocialMediaLinks {
        github: String
        twitter: String
    }

`;

// GraphQL query
const USER_QUERY = `
    query User($username: String!) {
        user(username: $username) {
            username
            profilePicture
            badges {
                id
                name
                image
            }
            followersCount
            isPro
            posts(page: 1, pageSize:6) {
                edges {
                    node {
                        title
                        url
                        publishedAt
                    }
                }
            }
            tagsFollowing {
                name
                logo
            }
            location
            socialMediaLinks {
                github
                twitter
            }
        }
    }
`;

// resolvers
const resolvers = {
    Query: {
        user: async (_, args) => {
            if (!args.username) {
                throw new Error("Username is required");
            }
            try {
                const response = await axios({
                    url: "https://gql.hashnode.com/",
                    method: "post",
                    data: {
                        query: USER_QUERY,
                        variables: {
                            username: args.username,
                        },
                    },
                });
                return response.data.data.user;
            } catch (error) {
                throw new Error("Server Error: ", error);
            }
        },
    },
};

// server setup
const server = new ApolloServer({
    typeDefs,
    resolvers,
});

const { url } = await startStandaloneServer(server, {
    listen: { port: 4000 },
});

console.log("Server ready at port", 4000);
"Wait, wait I am a beginner and just starting out. What have I just seen above?" Worry not 😁; let's break everything down.
To start, we are using NodeJS to run our server-side code, and Apollo Server, a specific package within NodeJS to handle our GraphQL operations. It’s like having a car (NodeJS) and a specialized engine within that car for maximum performance (Apollo Server) 🚗💨.
According to the documentation:
NodeJS is an open-source, cross-platform JavaScript runtime environment - the runtime environment that’s executing our JavaScript code server-side. It’s the foundation that allows JavaScript to run outside of a browser.
Apollo Server is an open-source, spec-compliant GraphQL server that's compatible with any GraphQL client, including Apollo Client. It's the best way to build a production-ready, self-documenting GraphQL API that can use data from any source.
npm install @apollo/server graphql - The Apollo server documentation has more details on these dependencies on the 'Get started' section. Install the dependencies and let's kick off.
We will go step by step, explaining each code block / operation in the backend code above, so that we can have a better understanding of what that entire code does, and how one section (code block) relates to the next.
Importing the packages
Did you just say that you are a beginner? Probably you did. I got your back 😎.
import { ApolloServer } from "@apollo/server";
import { startStandaloneServer } from "@apollo/server/standalone";
import axios from "axios";
ApolloServer- This is the core class for an Apollo Server. Think of it as the captain of our spaceship; the main component that will take us on our journey through the GraphQL universe. It is used to create a new server instance.startStandaloneServer- Our spaceship’s ignition system. This function starts a standalone Apollo Server, which is a server that runs independently of any other backend. We will learn more about this when we get to the 'setting up of the server' section.axios- According to the axios documentation, Axios is a promise-based HTTP Client for node.js and the browser. This is basically a tool for making requests and we use it here to send a POST request to the Hashnode GraphQL API (as we will discuss later in this blog). This is like our robot assistant that is always ready to fetch data at our command.
GraphQL schema
A schema outlines the structure of the data we will be dealing with. To define our GraphQL schema, we use the typeDefs constant. Remember we are in a spaceship? The typeDefs is like our spaceship’s blueprint that outlines the structure of the data we’ll be dealing with. It’s like a map of all the planets (data types) we can visit in our GraphQL universe.
// GraphQL schema
const typeDefs = `#graphql
    type Query {
        user(username: String): User
    }

    # User Schema
    type User {
    username: String
    profilePicture: String
    badges: [Badge]
    followersCount: Int
    isPro: Boolean
    posts(page: Int, pageSize: Int): Posts
    tagsFollowing: [Tags]
    location: String
    socialMediaLinks: SocialMediaLinks
    }

    type Badge {
        id: String
        name: String
        image: String
    }

    type Posts {
        edges: [Edge]
    }

    type Edge {
        node: Post
    }

    type Post {
        title: String
        url: String
        publishedAt: String
    }

    type Tags {
        name: String
        logo: String
    }

    type SocialMediaLinks {
        github: String
        twitter: String
    }

`;
In our example above, typeDefs defines a Query type and several related types: User, Badge, Posts, Edge, Post, Tags, SocialMediaLinks.
The
Querytype is special because it defines the entry points for our API; in this case, aUsertype that takes a username argument. In other words, it’s the starting point for any operation that fetches data from our API (Hashnodes API that is 🙂). TheQuerytype is like the main entrance to a building (API) while theUsertype is like a door labeled “User Information” in our building. When someone wants to get into the building through this door, they need to provide a username, which is the argument for ourUsertype as shown next to theuserfield. In Hashnode, there are different queries you can work with as per the documentation - Queries section. (As mentioned at the start, I started with the publication query which is still an entry point to our API but from a 'different angle' or a different main entrance to our building - API 🙂 )The
Usertype is the main type that represents a user on Hashnode. It includes fields likeusername,profilePicture,badges,followersCount,isPro,posts,tagsFollowing,location,socialMediaLinksand more. Each of these fields corresponds to some aspect of a user’s profile on Hashnode. You can get to learn more on the information you can retrieve from theusertype on the documentation - user type section.
Even before I get further in explaining different types in our schema, allow me to explain something before we get to
Badgetype... - The 'data types'. A data type is a particular kind of data item, as defined by the values it can take or the operations that can be performed on it. In GraphQL 'data' types, there are two kinds of types, the scalar types and the object types.Scalar types are the primitives of a GraphQL schema. They represent the leaves of the query. In our schema,
String,Boolean, andIntare scalar types. Object types are a kind of complex type that can have fields of their own, which can be either scalar types or other object types. In our schema,User,Badge,Posts,Edge,Post,Tags, andSocialMediaLinksare object types. They’re like custom types that we define for our specific needs, meaning that we can give them any names of our choice.What about the [square brackets]? In our
Usertype, we have thebadgesfield with theBadgetype ->badges: [Badge]. The square brackets mean thatbadgesfield is an array ofBadgeobjects meaning that a user can have multiple badges.We also have the
postsfield and thePoststype. ThePoststype also takes argumentspageandpageSize(as we explained about arguments in theUsertype) where both arguments expect integers -Intas the data type ->posts(page: Int, pageSize: Int): Posts.Postsis not in square brackets. This means that it's a complex type (object type) but not an array and so isSocialMediaLinks....but
tagsFollowing: [Tags], similar tobadgesmeans thattagsFollowingis an array ofTagsobjects. "A user can follow multiple tags".
We good? 😉 Back to our types...
The
Badgetype represents a badge that a user might have earned on Hashnode. It has fields likeid,name, andimagewhich represent the unique identifier of the badge, name of the badge, and image URL of the badge respectively. We have mentioned theBadgetype above while we were explaining different types but you can read more about the different fields inBadgetype in the Documentation - Badge type section.The
Poststype is used to fetch a list of posts by a user. It has a single fieldedgeswhich is an array ofEdgetype. More about the Posts type.The
Edgetype is a helper type used in pagination. It represents an edge in a connection (list of items). It has a single fieldnodewhich is of typePost. More abouts the Edge type.The
Posttype contains basic information about a post. A post is a published article on Hashnode. It includes fields liketitle,url,publishedAtwhich represent the title of the post, the URL of the post, and the date it was published respectively, and few more fields as per the documentation - Post type section.The
Tagstype represents a tag that a user is following on Hashnode. It has fields likename,logowhich represent the name of the tag and the URL of the tag’s logo respectively, and few more fields as per the documentation - Tags type section.Note (but forget for now): When we get to the frontend, you will notice that we are not using the tags on our Dev Card despite defining it in our schema. I will explain more when we get there but... I was still trying to figure out how I scale up the project later and have some well-styled background watermarks on the Dev card with some of the tags you're following (remember to forget about this for now to avoid any confusion, I will remind you once we get there 😂). Hope I didn't confuse you at that 'Note' section.
The
SocialMediaLinkstype represents the social media links of a user on Hashnode. It includes fields likegithub,twitterwhich represent the user’s GitHub and Twitter profile URLs respectively, and few more fields as per the documentation - SocialMediaLinks type section.
You can also learn more about the GraphQL schema in the GraphQL's documentation - schema section.
Done with types and the schema 🥳 We good? Onto our next code block - GraphQL query.
GraphQL query
"This is now our mission plan on our spaceship journey..." 😎
The USER_QUERY constant is a GraphQL query that fetches a user’s data from Hashnode. It details what data we want to fetch about a user from Hashnode. It’s like a shopping list for our robot assistant, axios.
Let's first have the GraphQL query code block:
// GraphQL query
const USER_QUERY = `
    query User($username: String!) {
        user(username: $username) {
            username
            profilePicture
            badges {
                id
                name
                image
            }
            followersCount
            isPro
            posts(page: 1, pageSize:6) {
                edges {
                    node {
                        title
                        url
                        publishedAt
                    }
                }
            }
            tagsFollowing {
                name
                logo
            }
            location
            socialMediaLinks {
                github
                twitter
            }
        }
    }
`;
"How is the GraphQL query related to the GraphQL schema, since there seems to be a relationship between the content in thetypeDefsconstant in the GraphQL schema and theUSER_QUERYconstant in the GraphQL query?" Good Question 😎
The GraphQL schema (typeDefs) and the GraphQL query (USER_QUERY) are like two sides of the same coin. They work together to define and request our data.
Think of the GraphQL schema (typeDefs) as a menu at a hotel. It lists all the dishes (types) available and the ingredients (fields) for each dish. For example, in our schema, we have a User dish that can come with username, profilePicture, badges, and other ingredients.
Now, the GraphQL query (USER_QUERY) is like placing an order from that menu. We specify exactly what dishes (types) we want and which ingredients (fields) we want with them. In our USER_QUERY, we’re ordering a User dish and asking for specific ingredients like username, profilePicture, badges etc.
To sum up, the schema (typeDefs) defines what data is available, and the query (USER_QUERY) asks for specific pieces of that data. It’s kinda like a conversation between us and the GraphQL server: the schema is the server saying “Here’s what I have,” and the query is you saying “Okay, I’ll have this and this, please.”
Hence, in our code above - USER_QUERY, we are just getting everything we have defined in the schema - typeDefs. Our User query takes one argument, $username, which is of type String. The exclamation mark ! after String means that this argument is required and the query won’t work without it. The user(username: $username) is where we’re calling the user field on our Query type (defined in our schema), and passing in the $username argument. This is like saying, “Hey, I want to get user data for the username I’m giving you.”
You can learn more about the GraphQL query in the GraphQL's documentation - queries section.
Resolvers
The resolvers map the operations defined in our schema (the user query) to functions that fetch the data for those operations.
In our spaceship analogy, these are the engines of our spaceship. 😁
// resolvers
const resolvers = {
    Query: {
        user: async (_, args) => {
            if (!args.username) {
                throw new Error("Username is required");
            }
            try {
                const response = await axios({
                    url: "https://gql.hashnode.com/",
                    method: "post",
                    data: {
                        query: USER_QUERY,
                        variables: {
                            username: args.username,
                        },
                    },
                });
                return response.data.data.user;
            } catch (error) {
                throw new Error("Server Error: ", error);
            }
        },
    },
};
In our example above, our user resolver sends a POST request, method: "post", to the Hashnode GraphQL API using axios, with the request body (data) being USER_QUERY as query and the username argument as the variable. It’s like sending our robot assistant (axios) to fetch a book from a library (Hashnode API).
We are also performing a simple check to make sure that a username argument was provided with the if statement. If not, it throws an error - "Username is required".
Once our data is fetched, we're returning the user field from the response - return response.data.data.user;. This is the data that will be sent back to whoever made the user query -> the request (The data we send to our frontend as we will cover inna few). It’s like our robot assistant returning from the library and handing us the book we asked for.
Not to forget, we are using a try...catch statement where in the try block, we write our code that is to be executed then in the catch block, incase anything goes wrong during data fetching, we are 'catching' the error and throwing a new one on what went wrong. It’s like, incase our robot assistant doesn't get the book we requested for, it tells us if there was a problem at the library.
You can learn more about resolvers, "How Apollo Server processes GraphQL operations", in the Apollo Server documentation - resolvers section.
Onto our final section 🚀 - setting up of the server.
Setting up the server
// server setup
const server = new ApolloServer({
    typeDefs,
    resolvers,
});

const { url } = await startStandaloneServer(server, {
    listen: { port: 4000 },
});

console.log("Server ready at port", 4000);
Finally, a new Apollo Server is created with the typeDefs and resolvers, and started on port 4000 using the startStandaloneServer.
"What did he just say?" 🙄
Finally, we’re ready for takeoff! 🚀 We have created a new ApolloServer spaceship with our captain and engines, ignited it with startStandaloneServer, and launched into the internet cosmos on port 4000 😄. We then announce our successful launch with a console log.
We are first creating an instance of ApolloServer, and calling it server, we are then using the startStandaloneServer function to help us get started with the Apollo Server quickly. The startStandaloneServer function accepts two arguments. The first argument is required, which is the instance of ApolloServer (server) to begin listening for incoming requests and the second argument is optional, which is an object for configuring our server's options.
You can learn more about the startStandaloneServer in the Apollo Server documentation - API Reference: startStandaloneServer.
We’re now cruising through the GraphQL universe 🚀, and fetching data with our robot assistant, axios. 🤖
Done... Yeah, we are done with our backend. How was that? Interesting, I guess 😅
Where to now? The fun section... The User Interface - The Frontend 🕺
Wait, wait, we are not yet done 😄. Lemme also mention that besides NodeJS as the runtime, @apollo/server and graphql as the dependencies, I have also used Nodemon, a tool that helps develop NodeJS based applications by automatically restarting the node application (server) when file changes in the directory are detected. Nothing much to explain about Nodemon since it's just a tool that does as I have explained 😂.
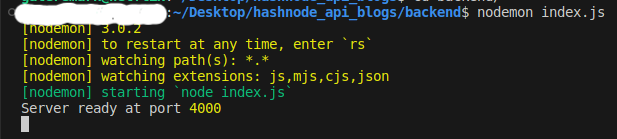
After we are done setting up the backend / server, we will open the terminal and run the dev script to start our app in the development server. For my case, since I am using nodemon, I will run
nodemon index.js- index.js being the file with our backend code and "Server ready at port 4000" will be logged on the console showing that our backend is ready and waiting for any requests.
And now we are done with the backend 😊.
Frotend
It should be 'Frontend' but in case you didn't notice the typo, first take a rest 😂. I know all that backend work was a bit overwhelming. Wait, wait, don't go. What if we take a rest having a sneak peak of this application we have been building the backend for, so that we can have a taste of the UI we are 'coming back' to build. Yeah, sure 🚀
+ them that have rushed here first at the start of the blog post to have a taste of the live app... 👀
Head over to:
...and try out the app, click around, and see what we are building. Remember, we should be back in 5 minutes to continue building the UI 😉.
You back? Thank you... Let's keep going.
Before we dive into the nitty-gritty of building our frontend, allow me to start by mentioning the tools I have used for the frontend and then I can explain each tool in detail once I get to the point we are to use it.
A moment to familiarize ourselves with the tools in our toolbox:
ReactJS - Mmhhh sweet... Than one JavaScript library that almost everyone is using.
"ReactJS or React is one of the most popular JavaScript(JS) libraries as of 2023, used for building dynamic user interfaces. It has over 200K stars on GitHub and over 40% of professional developers say they use it extensively. It has gained widespread adoption due to its simplicity, flexibility, and performance*. " - credits to gateremark for his blogpost ->* ReactJS 101: Let's Build Robust Web Applications with React. 😅
You're new to ReactJS? Get started by checking my blogpost ReactJS 101, here on Hashnode, to have a good grasp on how to get started with React.
TypeScript - "But I am new to TypeScript. How am I going to get through this?". Do you know what? I didn't even used typescript features 😅. Yes, I didn't use features like interfaces, type annotations etc. "What do you mean you didn't use type annotations?". Aha! I just used
any, everywhere 😶.Note: This is NOT, and I repeat 😁, this is not a good practice while working with TypeScript... cause why use TypeScript and just use
anyeverywhere? 😂 Learn more about TypeScript and how to work with it, from their documentation.
Tailwind CSS - This will be our styling framework. It's super easy to get started with tailwind classes, and its installation process is so direct in its documentation.
Apollo Client - Remember we used Apollo Server for our backend? This time we use Apollo Client to wire up our backend with the frontend, but we will discuss this in detail once we get there.
React Icons - 'Nothing too complex'. This is just a collection of popular icons, which are used as React components. More about React icons.
React Tilt - As the name goes, it is a 'tilting' package 😅, that is, a package that allows us to add lightweight parallax hover tilt effect to our components. More about React Tilt.
How the React Tilt package works in our app:
html-to-image - This is our main tool to convert our card (in HTML code) to a downloadable image. (As per the documentation): It generates an image from a DOM node using HTML5 canvas and SVG.
Others:
pnpm - Built on top of npm but a faster and a more efficient package manager that npm.
vite - A build tool that is designed to be fast and optimized for modern web development workflows. It works like create-react-app but with additional advantages. Learn more on the differences between vite and cra in my blog - ReactJS 101.
"Just spent the whole day coding this amazing feature. You're done, celebrating and feeling accomplished!"
...only to discover there's already a React package that does the exact same thing. 🤦♂️😅
Yeah, packages really come in handy in reducing development time and effort. They help one avoid reinventing the wheel and focus on the core functionality of the application. Remember, users are never interested in the technologies you have used in building that complex application 😂 ...but is it working and working as per their needs?
Now that we have familiarize ourselves with the tools we are to use for the frontend, let's now start working on our UI.
npm create vite@latest - With pnpm as our package manager and vite as our build tool, we bootstrap our React app, setting a foundation for efficient development.
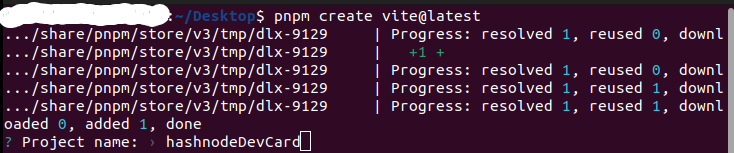
We now have our React app, named after our name of choice - hashnodeDevCard. The next step is to install the dependencies. Install the dependencies as per their documentations (links attached to each tool (dependency) explained above) and now we are set to start writing our Frontend code.
App Component - App.tsx file
import { ApolloClient, InMemoryCache, ApolloProvider } from "@apollo/client";
import User from "./components/GetUserData";

// Set up Apollo Client
const client = new ApolloClient({
    uri: "http://localhost:4000/",
    cache: new InMemoryCache(),
});

function App() {
    return (
        <ApolloProvider client={client}>
            <div className="flex flex-col items-center justify-center min-h-screen">
                <User />
            </div>
        </ApolloProvider>
    );
}

export default App;
In the code above, we’re first importing the necessary modules. ApolloClient, InMemoryCache, and ApolloProvider are imported from @apollo/client, (that we installed as a dependency), which are essential parts of Apollo Client. The User component is imported from ./components/GetUserData. (We'll be getting into the User component inna few).
ApolloClient is the main class that we use to interact with our GraphQL API. InMemoryCache is Apollo Client’s default caching system. (In our previous spaceship analogy) It is like the spaceship’s storage system, storing information about the planets (data) we have visited so we don’t have to travel there again. This means that it normalizes our data, caches requests to avoid unnecessary network calls, and helps to keep our local data consistent. ApolloProvider is a React component that wraps our React app and places it on the context, enabling us to access it from anywhere in our component tree.
After importing the dependencies, we set up Apollo Client by creating a new instance of ApolloClient and passing in uri and cache. The uri is the endpoint of our GraphQL server (Hope our server is still running on port 4000). This means that in case we any query using Apollo Client, it will send the request to this uri. The server then processes this request, performs any necessary actions (like fetching data), and sends a response back to Apollo Client. Note: After deploying your backend, to any platform like Heroku, Render, Railway etc., remember to update this uri since the backend will now not be running in your development server (localhost) but on a production server.
My backend is running at https://hashnode-api.onrender.com in the production server - using Render.
The cache is an instance of InMemoryCache, which Apollo Client uses to cache query results. Here, we set up the cache for our Apollo Client instance, allowing it to store and manage our GraphQL data locally.
We then set up our App component, which is wrapped in ApolloProvider, making the Apollo Client instance (client) available to all other components in the component tree. Inside the ApolloProvider, we have a div with some Tailwind CSS classes for styling (I may not be explaining all the styling classes I have used in the project, but you can refer to thetailwind documentationfor reference). Inside this div, we then render the User component.
User Component - GetUserData.tsx file
I will not paste the entire code, but rather, the main sections that really need to be explained. Kindly refer to theprojects GitHub repository (frontend_hashnode directory)to get the entire code I used for the frontend.
import { useQuery, gql } from "@apollo/client";
import { useState } from "react";
import ShowInfo from "./ShowInfo";

const GET_USER = gql`
    query User($username: String!) {
        user(username: $username) {
            username
            profilePicture
            badges {
                id
                name
                image
            }
            followersCount
            isPro
            posts(page: 1, pageSize: 6) {
                edges {
                    node {
                        title
                        url
                        publishedAt
                    }
                }
            }
            tagsFollowing {
                name
                logo
            }
            location
            socialMediaLinks {
                github
                twitter
            }
        }
    }
`;

function User() {
    const [username, setUsername] = useState("");
    const [inputValue, setInputValue] = useState(username);
    const { loading, error, data, refetch } = useQuery(GET_USER, {
        variables: { username },
    });

    // if (loading) return <p className="text-center mt-6 text-lg">Loading...</p>;
    if (error && error.message.includes("Server Error"))
        return (
            <p className=" text-xl font-semibold ml-2 mt-2 text-[#ff2424] p-2">
                {`${error.message}`}
            </p>
        );

    const handleSubmit = (e: any) => {
        e.preventDefault();
        setUsername(inputValue);
        refetch()
            .then(() => console.log("Refetching!"))
            .catch((err) => console.log(err));
    };

    return (

// {Refer to the GetUserData.tsx file in the repository for this code}

            {data ? (
                <ShowInfo data={data} />
            ) : (

                // {Refer to the GetUserData.tsx file in the repository for this code}

                )

    );
}

export default User;
First, we are importing the necessary modules; useQuery and gql which are imported from @apollo/client. They are essential parts of Apollo Client, for us to manage to get our data from our server. useState is a React hook that lets us add state to our functional components. The ShowInfo component is imported from ./components/ShowInfo. (We'll be getting into the ShowInfo component inna few; since that's where we have our card).
useQuery is a React hook provided by Apollo Client. In our code above, we are using useQuery to execute the GET_USER query and fetch user data from our server. The useQuery hook returns an object that contains our query result, along with properties like loading, error, and data that gives us information about the state of our query, as we will be seeing inna few. To learn more about the useQuery hook, you can refer to the Apollo documentation on - Fetching data with the useQuery hook.
gql is a JavaScript template literal tag that parses our GraphQL queries. Remeber our spaceship analogy,gqlis like a translator on our spaceship that converts our mission plan (GraphQL query) into a language (GraphQL syntax) that the server can understand. In our project, we are using gql to parse our GET_USER query.
Remember in our backend we had the USER_QUERY query? The GET_USER query is identical to the USER_QUERY in our backend. It’s asking for the same data (username, profilePicture, badges, etc.) from the same type (User). We then use useQuery to execute the GET_USER query and fetch user data from our backend.
At the start of our User component we are using useState to create two state variables: username and inputValue. We are then calling useQuery with our GET_USER query and passing in an options object that includes the username variable. Remember, from our backend, in the defining of our schema and query, username was an argument that has to be passed or else, throw new Error("Username is required"); from our if block.
loadingis a boolean (true or false) that indicates whether the query is still in progress. Ifloadingistrue, it means the data is still being fetched and we can perform some tasks like, (from our app), display a loader and/or disable the submit button.
datais the result of our query. It contains the data that has been fetched from our server. In our code above / project, the data fetched from our server is the user data (based on theirusername).refetchis a function that we call to execute the query again. This is useful when we want to refresh our data.
After that, we are using an if statement to check if there was an error when making the query. If there was an error and the error message includes “Server Error”, we’re returning the error message.
We then have a handleSubmit function which is called when the form is submitted. It prevents the default form submission behavior (like refreshing the page), then sets the username to the current inputValue, and then calls refetch to re-run the query with username provided. Note: The form's code is not available in our code block above. Kindly refer to the projects repository to also learn about the styling - the transitions applied in the form (or else our blog will be 2 hours long 😅).
We then have a return statement where if there’s data, we render the ShowInfo component (our next component, we'll be discussing) and passing the data we received from our server as a prop, so that we can use it in that component. (In our project) If there’s no data, we are rendering the section with a form that requests the user to add their username.
Finally, we are exporting the User component as the default export so that we can then import it in the App component (that we discussed previously).
ShowInfo Component - ShowInfo.tsx file
import { toPng } from "html-to-image";
import { useRef, useState } from "react";
import { RiVerifiedBadgeFill, RiTwitterXLine } from "react-icons/ri";
import { FaGithub } from "react-icons/fa6";
import { MdLocationPin } from "react-icons/md";
import { Tilt } from "react-tilt";

const ShowInfo = ({ data }: any) => {
    const elementRef = useRef<HTMLDivElement | null>(null);
    const [loading, setLoading] = useState(false);

    const profilePicture = data.user.profilePicture;
    const username = data.user.username;
    const followers =
        data.user.followersCount > 1000
            ? (data.user.followersCount / 1000).toFixed(1) + "K"
            : data.user.followersCount;

    const isPro = data.user.isPro;
    const badges = data.user.badges;
    const posts = data.user.posts.edges;
    const location = data.user.location;
    const socialMediaLinks = data.user.socialMediaLinks;
    const github = socialMediaLinks.github.split("/").pop();
    const twitter = socialMediaLinks.twitter.split("/").pop();

    //  FUNCTION TO CONVERT HTML TO IMAGE
    const htmlToImageConvert = () => {
        setLoading(true);
        try {
            if (elementRef.current) {
                toPng(elementRef.current, { cacheBust: false })
                    .then((dataUrl) => {
                        const link = document.createElement("a");
                        link.download = "hashnodedev.png";
                        link.href = dataUrl;
                        link.click();
                    })
                    .catch((err) => {
                        console.log(err);
                    })
                    .finally(() => {
                        setLoading(false);
                    });
            }
        } catch (error) {
            console.error("Error converting to image: ", error);
        }
    };
    return (
        <div className="md:grid lg:grid-cols-2 w-full h-full grid-cols-1">

            {/* Refer to the ShowInfo.tsx file in the repository for this code */}

            <Tilt>

                    {/* Refer to the ShowInfo.tsx file in the repository for this code */}

            </Tilt>
            <button
                className="bg-gradient-to-r from-[#00c6ff] to-[#0072ff] text-white p-2 rounded-lg mt-2 lg:absolute lg:bottom-1/2 lg:right-10 z-50 w-fit"
                onClick={htmlToImageConvert}
            >
                {loading ? "Downloading..." : "Download DevCard"}
            </button>
        </div>
    );
};

export default ShowInfo;
We are starting by importing our modules. (I believed by now, incase you are new to all this, you understand that we always start by importing the dependencies / modules that are to be used in that component / file).
toPng is a function from the html-to-image library (that we explained in the tools section above), that converts our HTML card block to a PNG image. useRef and useState are React hooks. RiVerifiedBadgeFill, RiTwitterXLine, FaGithub, and MdLocationPin are specific icons from the react-icons library (as we mentioned in our tools section). Tilt is a component from the react-tilt library that adds a tilt effect to its children (which is our card).
We then have the ShowInfo component, where we are receiving our data prop (the data we are receiving from our parent component, User). We are also using useRef to create a reference (elementRef) that we attach to our DOM node. This will allow us to access that node directly within our component. We are also using useState to create a loading state variable and its setter function setLoading.
We are then extracting that data which includes the user’s profile picture, username, number of followers, whether the member is a Hashnode pro user, and more, and storing it in variables. For the number of followers, we are formatting it so that it can appear in a shorter format on our card. Additionally, for the social media links, we are formatting and only getting the GitHub and Twitter usernames.
Next, we have the htmlToImageConvert function which is called when the user clicks the "Download DevCard" button. When the function is called, it sets loading to true, converts the referenced DOM node to a PNG image using toPng, creates a new link with the PNG as its href, triggers a click event on the link to download the image, and finally sets loading back to false. 😎 You can reference the html-to-image documentation to have a deeper understanding of what that function does.
In our return statement, that's where we have our card element code but feel free to learn more about the code by downloading the project from the repository. In this card, that's where we are passing the data we have previously extracted and then styling everything out so that the card can look impressive. We also have a "Download DevCard" button that when clicked, it calls the htmlToImageConvert function.
Note that on the platform, we not only display the generated card, but also the latest 6 posts of the user. The filtering is done at our backend, in our query, USER_QUERY -> posts(page: 1, pageSize:6) { ... } hence we only receive 6 latest posts from the user to display on our frontend.
Lastly, we are exporting the ShowInfo component so that we can import it in our previous discussed component - User.
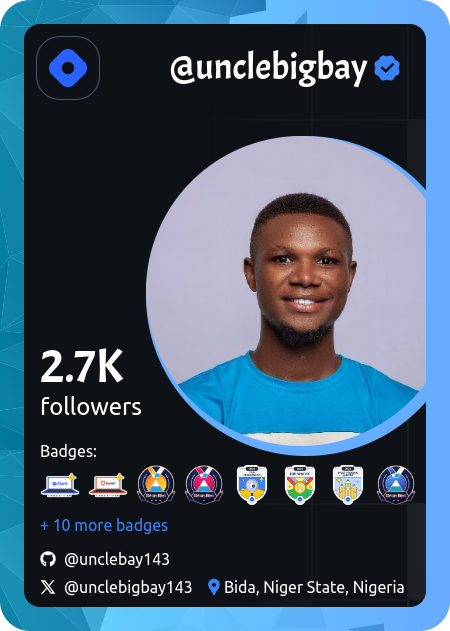
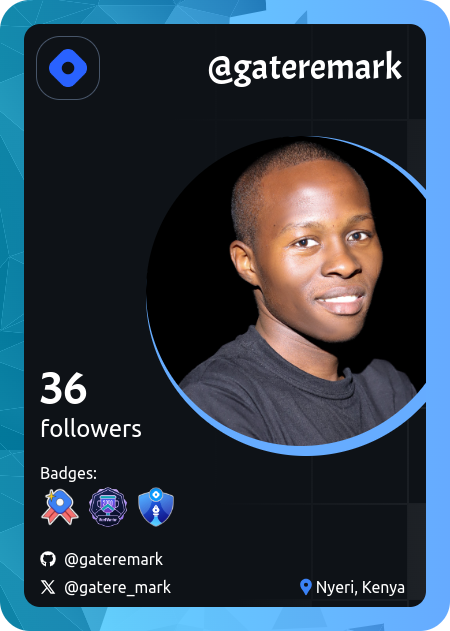
Sample Generated DevCards:


Conclusion
...and that’s a wrap! 🎉 How was that? 😊 Interesting I believe.
If you’re eager for more, feel free to go through the documentations I have attached in each section, clone the project from GitHub, and add your own unique features to our 'spaceship' ...and I can't wait for your pull requests 😉.
Until our next adventure... bye bye 👋.


